Last updated November 17, 2026








Free written scope consultation - allowances, timeline, and change-order rules on paper before a single trade is scheduled
Home Remodeling Maintenance Schedule: What to Do and When
Most remodeling warranties void themselves silently. A cracked bead of caulk around a new tub lets moisture reach the cement board behind the tile, and by the time you notice a soft spot or a stain on the ceiling below, the guarantee window has closed and the damage is yours to pay for. We’ve walked into Long Beach bathrooms where a $40 caulk repair had become a $6,000 tile-and-substrate rebuild, and the homeowner never got a warning. That’s what this guide is for. It’s a post-remodel maintenance schedule built around one idea: the conditions around your new kitchen and bath decide how long they last, and most of them are cheap to control. Below you’ll find a room-by-room calendar, the tasks that actually protect your warranty, and a printable checklist you can hand to whoever does your annual walkthrough.
Quick Answer
A home remodeling maintenance schedule is a calendar of inspection and upkeep tasks tied to the materials you just installed – resealing grout and caulk joints every 6 to 12 months, adjusting cabinet hinges and drawer glides annually, and checking moisture levels around tubs, showers and sinks every season. The goal isn’t keeping things pretty; it’s catching the small failures that void a 1-year workmanship warranty and turn a minor repair into a full re-do. In Long Beach, coastal humidity makes moisture-related tasks the priority, and the lack of freeze-thaw cycles means you can skip the winterizing steps you’d need in colder climates.
Styles & brands we work with
- Kitchen remodeling
- Bathroom remodeling
- Home additions & ADU
- Roofing
- Windows & doors
- Driveway & pavers
- Fence
Table of Contents
- Why a Maintenance Schedule Protects Your Remodel Investment
- Remodel Maintenance vs. General Home Upkeep: Know the Difference
- The Warranty Window: What to Inspect Before the 1-Year Mark
- Month-by-Month Calendar for Long Beach Homes
- Room-by-Room Task List
- What Substrate Failure Looks Like From the Surface
- The One-Page Annual Walkthrough Checklist
- Common Mistakes to Avoid
Why a Maintenance Schedule Protects Your Remodel Investment
When you spend $18,000 to $55,000 on a kitchen or $12,000 to $35,000 on a bathroom, the warranty you receive is a contract with conditions. Those conditions are rarely spelled out loudly, but they’re real: grout lines that stay sealed, caulk joints that stay intact, cabinet hardware that isn’t left to sag and tear its pilot holes. Ignore them and the contractor has every right to say the failure came from neglect, not workmanship. That’s not a loophole – it’s the same standard any written guarantee carries.
Here’s the part most homeowners miss. A remodel doesn’t fail all at once. It fails at the seams. The joint where tile meets a tub apron. The caulk line where a backsplash meets a countertop. The seal at the base of a shower niche. Each of those is a controlled gap that was deliberately filled with a flexible material, and each one has a working life of roughly 6 to 12 months in a humid climate. Long Beach sits close enough to the water that interior relative humidity swings hard between a foggy June morning and a dry Santa Ana afternoon. That cycle works flexible sealants open and closed like a pump, and the smaller the bead, the faster it gives up.
The fix is a schedule you actually follow. Three or four inspections a year, each under an hour, catch nearly everything before it escalates. We’ve seen homes on the east side of Long Beach where a simple annual caulk check would have saved the vanity, the drywall and a chunk of the subfloor. As a Penhallow Remodeling Long Beach home standard, we put the price and the guarantee in writing before work starts – and that includes a written guarantee on every repair, so a return visit costs you nothing inside the guarantee period. The schedule below helps you hold up your end so we can hold up ours.
Remodel Maintenance vs. General Home Upkeep: Know the Difference
Most maintenance guides blend two completely different jobs and leave you unsure what actually matters. It’s worth separating them. General home upkeep keeps the structure and systems running – HVAC filters, gutters, water heater flushes, smoke detector batteries, roof inspections. Remodel maintenance keeps the specific assemblies a contractor installed – the tile, the grout, the cabinets, the counters, the fixtures – performing the way their warranty assumes. The two lists overlap almost nowhere, and mixing them is how people spend a Saturday on gutters while their shower niche quietly rots.
Remodel maintenance (protects your warranty):
- Resealing grout and caulk joints in wet areas
- Adjusting cabinet hinges, drawer glides and soft-close dampers
- Checking countertop seams and backsplash joints for separation
- Inspecting the substrate behind tile at the first sign of flex or hollow sound
- Replacing worn faucet cartridges and checking supply line connections
- Confirming exterior door and window seals, especially on sliding glass and picture windows
General home upkeep (protects the structure):
- HVAC filter changes and seasonal service
- Gutter cleaning and roof checks, more urgent here than in dry inland cities
- Water heater flush and pressure relief valve test
- Smoke and carbon monoxide detector batteries
- Exterior paint touch-ups and siding inspection
If you’re planning a Kitchen Remodeling in Long Beach or a bath overhaul, ask your contractor which tasks protect the workmanship warranty specifically. A good crew will tell you plainly. Ours do, because a warranty nobody understands protects nobody.
The Warranty Window: What to Inspect Before the 1-Year Mark
Most workmanship warranties on remodels run 1 year, and the 365-Day Done Right Promise follows that same rhythm – if the work fails inside the guarantee period, we come back and fix it at no charge, and that’s written on every project. The catch is timing. If a hinge fails at month 13, or a caulk joint opens at month 14, you may be outside the window and paying for a repair that would have been covered two months earlier. The solution is a deliberate inspection at month 10 or 11, before the warranty expires, while any real defect is still the contractor’s responsibility.
What to look for in that final pre-warranty pass:
- Caulk and grout joints. Run a fingernail along every wet-area joint. It should feel firm, not gummy or crumbling. Any gap, crack or discoloration gets documented with a photo.
- Cabinet doors and drawers. Open and close each one slowly. Listen for squeaks, watch for sagging or doors that no longer meet the frame evenly. Hinges that loosen repeatedly often mean stripped pilot holes, not just a loose screw.
- Countertop seams. Look for a hairline gap or a shadow where two pieces of quartz or stone meet. Cambria, Silestone and Caesarstone all carry their own material warranties, but a seam failure is a workmanship issue.
- Floor transitions. Check the joints where new flooring meets old, and where tile meets a threshold. Any lift or rock is a substrate question.
- Fixtures and supply lines. Look under every sink for moisture, and around the base of every toilet for movement or staining.
- Tile sound. Tap lightly across the floor and shower walls with a plastic tool. A hollow, dead sound over a patch of tile means the thinset didn’t bond and the substrate may be failing.
Document everything with photos and a dated note. If something’s off, call the contractor before the year closes – not after. For most homeowners that’s the difference between a free repair visit and a paid one.
Month-by-Month Calendar for Long Beach Homes
A maintenance calendar built for a cold-climate house is the wrong tool for Long Beach. We don’t get freeze-thaw cycles here, so there’s no winterizing ritual to run. What we do get is coastal humidity, salt air near the water, and the June gloom that keeps surfaces damp for weeks at a stretch. That changes when tasks matter. Here’s a schedule built around Long Beach weather, not a generic national template.
January – February (drier air): Prime time for inspection, because low humidity reveals shrinkage cracks in caulk and grout that humid months hide. Reseal shower and tub joints. Check cabinet hardware, tighten the loose ones, and rotate the drawers to spread wear. This is also the best window to seal natural stone counters and re-caulk backsplash seams.
March – May (fog season begins): Watch for condensation on windows during the morning fog. In Long Beach that condensation collects on interior glass and runs down wet walls if the window seals are aging. Check exterior door sweeps and window seals – a window system like CWS or ES Windows should stay tight for years, but seals are a wear item. Ventilate the bathroom during showers to keep moisture off the substrate.
June – August (dry and warm): The quiet stretch. Focus on cabinet deep-clean and hinge adjustment, and re-level any doors that have drifted. This is the season to look at caulk at its most stable – any crack you see now is a real crack, not just a weather response. Check that kitchen exhaust fans vent outside and are pulling air, not just making noise.
September – November (Santa Ana season): Big temperature and humidity swings open seams. Walk the whole home and check the caulk line at every counter, backsplash, tub and floor transition. Tighten under-sink connections and look for signs of cabinet swelling near the dishwasher. Reseal any exterior penetrations before the wet months arrive.
December (year-end review): If your remodel anniversary lands here, do the full pre-warranty walkthrough from the section above. A calendar reminder keeps you honest and keeps the guarantee alive.
Room-by-Room Task List
The calendar tells you when. This section tells you where. Each task below is tied to the material or assembly that fails first, and the failure mode is specific – not “check for problems.” If you know what you’re looking for, you’ll spot it in a minute.
Kitchen:
- Reseal the backsplash-to-counter joint with a flexible silicone caulk once a year. This joint moves constantly.
- Adjust hinge screws and drawer glides every 6 months. Loose hardware works itself wider over time, and by the next year the pilot hole is gone.
- Check the seal around the sink rim and the base of the faucet. A failing seal lets water wick under the sink and into the cabinet base.
- Inspect the subfloor under the dishwasher for soft spots. Even a slow drip from a supply line can rot a cabinet base in one humid season.
Bathroom:
- Reseal all caulk joints at the tub, shower floor, niche and vanity backsplash every 6 to 12 months.
- Seal grout on floors and shower walls every 12 to 18 months, sooner in high-traffic secondary baths.
- Check the shower pan and the seal at the base for any flex underfoot – that’s the substrate telling you moisture is migrating.
- Look at the base of the toilet and around the flange. Movement or staining means a wax ring is failing.
Whole-home touches: Confirm exterior door seals and thresholds, check window seals, and keep an eye on any area where a new surface meets an old one. When planning that work, our Bathroom Remodeling in Long Beach and General Contractor in Long Beach teams build these joints into the plan from the start, because they’re the first place any remodel is tested. The materials we install – Kohler and Moen fixtures, KraftMaid and Wellborn cabinetry, Cambria and Silestone counters – all carry their own warranties, but those warranties assume the seams around them are maintained.
What Substrate Failure Looks Like From the Surface
The substrate is the layer behind the surface – cement board behind tile, plywood under flooring, the framing and backer that hold everything flat. When it fails, it usually fails out of sight. You catch it early by knowing the surface signs, because by the time there’s visible damage, you’re looking at a re-do, not a repair. Here’s what to watch for in a remodeled room.
- Hollow or dead sound. Tap tile with a plastic tool. If it sounds hollow across a patch, the thinset didn’t bond fully and moisture may already be working underneath.
- Grout that cracks in a line. A single hairline crack may be shrinkage. A crack that follows a straight line or a joint edge is likely substrate movement.
- Tile that flexes. Press gently in the center of a floor tile. Any give is a warning that the layer underneath is soft or unbonded.
- Loose grout at the edges. Grout that powders or lifts at the edge of a shower or tub often means a caulk joint failed and water is behind it.
- Soft drywall near a wet area. Press on the drywall just below a shower niche or at the corner of a tub. Spongy texture means moisture is traveling behind the finish.
- Musty smell. A persistent smell in a remodeled bath with no visible mold usually means the substrate is wet somewhere you can’t see.
- Dark staining or bubbling paint. On a ceiling below a second-floor bath, or on a wall beside a shower, this is moisture finding the path of least resistance.
If you see any of these, stop touching it and get a professional to look. For tile and shower assemblies, a trained eye can tell the difference between a caulk failure and a substrate failure in a short visit, and that distinction is the difference between a $150 reseal and a $5,000 rebuild.
The One-Page Annual Walkthrough Checklist
Print this and hand it to whoever does your annual walkthrough – a family member, a handyman, or your contractor. Each item has a clear pass or fail, so nothing gets skipped and nothing gets guessed at. This is the checklist we’d want used on our own projects.
- Bathroom caulk joints – every tub, shower, niche and backsplash joint is firm and continuous. ___ Pass ___ Fail
- Bathroom grout – no cracks, powdery sections or loose edge pieces. ___ Pass ___ Fail
- Shower floor and pan – no flex underfoot, no dark staining at the drain or perimeter. ___ Pass ___ Fail
- Kitchen backsplash and counter seams – no gaps, shadows or separation. ___ Pass ___ Fail
- Cabinet hinges and drawers – every door meets the frame evenly, no sag or squeak. ___ Pass ___ Fail
- Under-sink connections – dry at every supply and drain connection, no swelling in the cabinet base. ___ Pass ___ Fail
- Toilet base – no movement, no staining at the flange or floor. ___ Pass ___ Fail
- Floor transitions – no lift, rock or gap where new meets old. ___ Pass ___ Fail
- Exterior doors and windows – seals tight, sweeps make contact, no fog or condensation between panes. ___ Pass ___ Fail
- Tile sound check – tap a sample of floor and shower tiles, no hollow patch. ___ Pass ___ Fail
- Exhaust fans – venting outside, moving air, not just humming. ___ Pass ___ Fail
- Documentation – photos taken, dated, and the warranty anniversary marked on the calendar. ___ Pass ___ Fail
Any fail on items 1 through 8 gets a call to the contractor before the 1-year mark if you’re still inside it. Those are the ones that escalate fastest.
Common Mistakes to Avoid
- Treating maintenance as cosmetic. A homeowner in Long Beach who reseals a tub joint only when it looks shabby has already waited too long. The joint fails months before it looks bad, and moisture is already in the substrate by the time you see the crack.
- Using the wrong sealant. Grout and caulk are not interchangeable. Caulk is flexible and goes at the joints that move; grout is rigid and goes in the fields between tiles. Caulking a grout field or grouting a moving joint both cause failure.
- Skipping the pre-warranty walkthrough. The single most expensive oversight is missing the 1-year inspection. A failure reported at month 11 is covered. The same failure reported at month 14 is a paid repair, and the difference is one calendar reminder.
- Using hard cleaners on wet-area surfaces. Abrasive cleaners eat the sealant and strip the finish off grout. Mild soap and water on a scrub pad handles most of it, and a neutral cleaner protects the warranty assumption.
- Assuming coastal humidity does the work. Long Beach humidity helps and hurts at the same time. It keeps wood cabinets from drying out and cracking, but it also feeds mold in wet areas and drives the caulk pump faster. Balance matters, and ventilation is the control.
- Over-tightening cabinet screws. Tightening a loose hinge every time it sags strips the pilot hole slowly. Adjust the hinge plate first, and use a slightly longer screw only when adjustment genuinely fails.
- Never venting the bathroom. The exhaust fan should run during and after showers and vent outside. A fan that only recirculates or never runs is the number-one cause of bath substrate failure we see in Long Beach.
See the difference
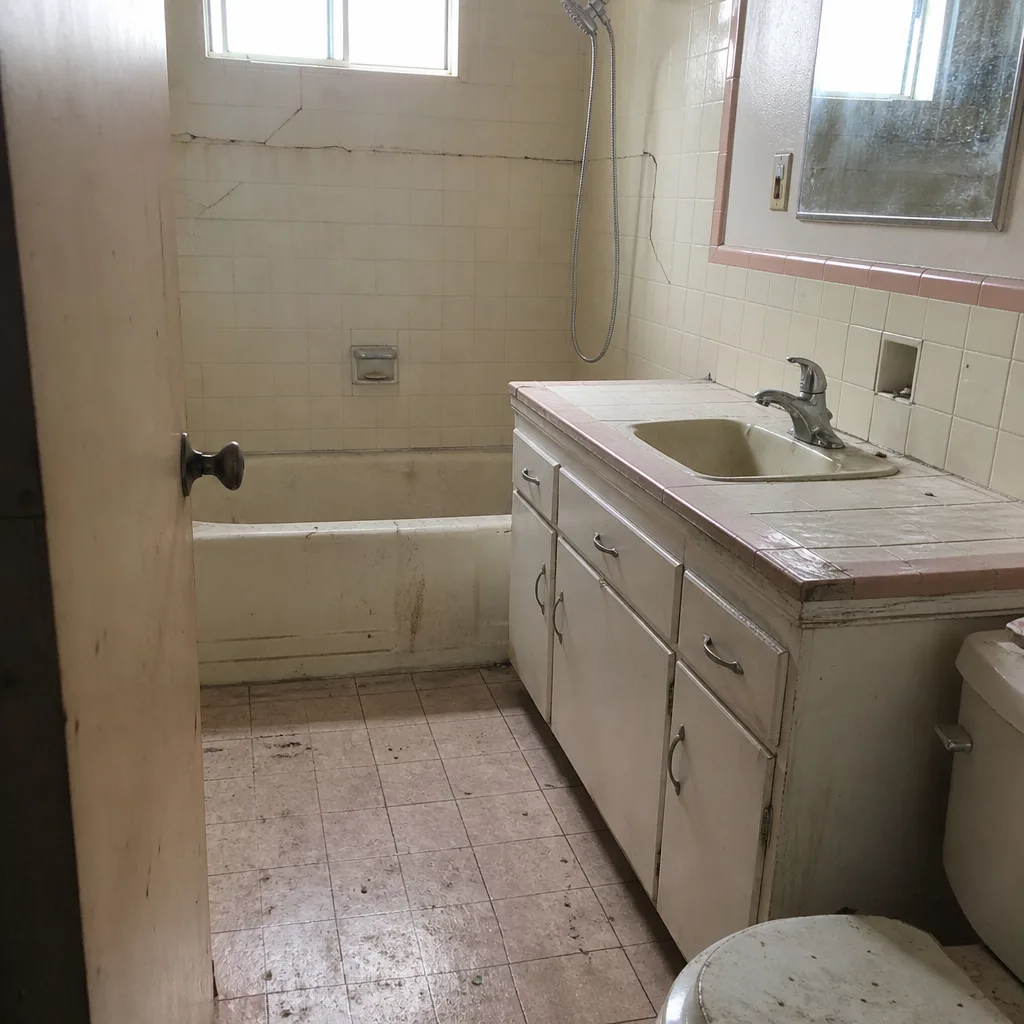 Before
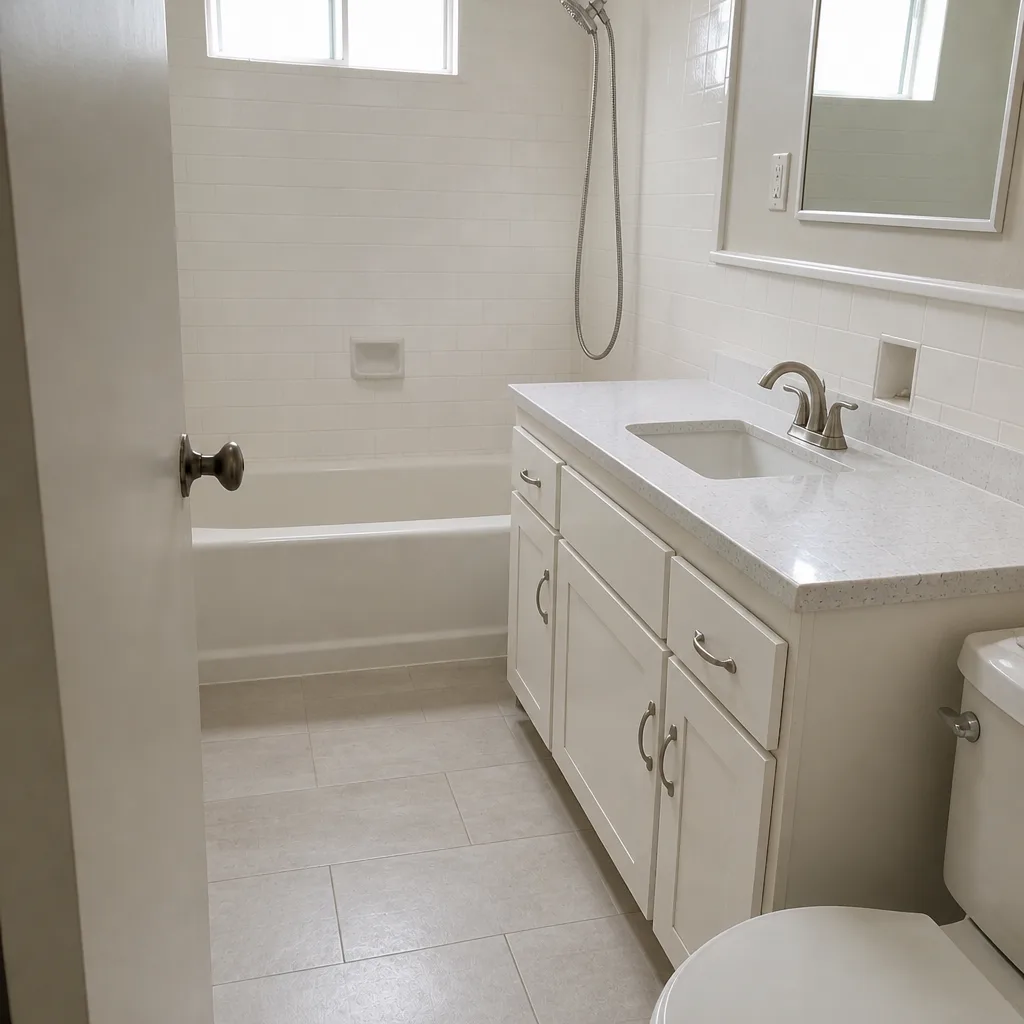 After
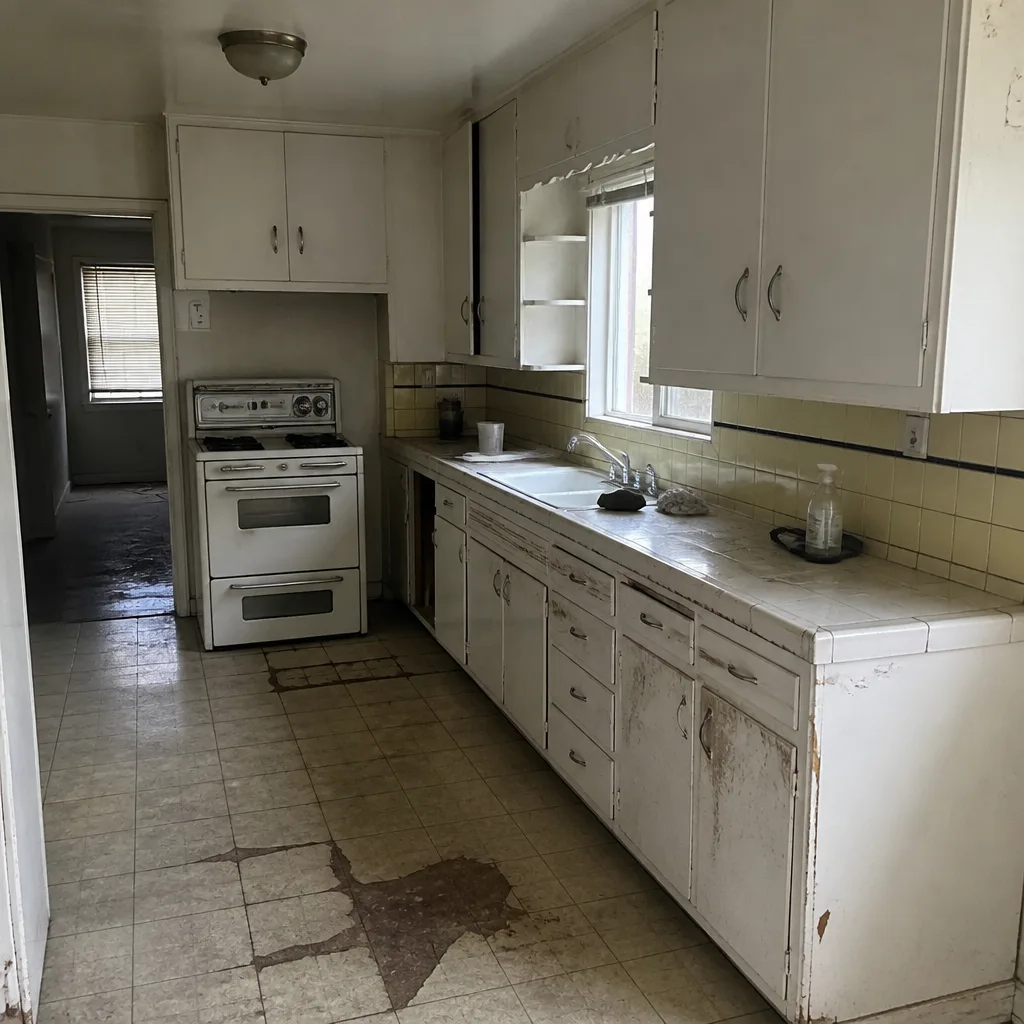 Before
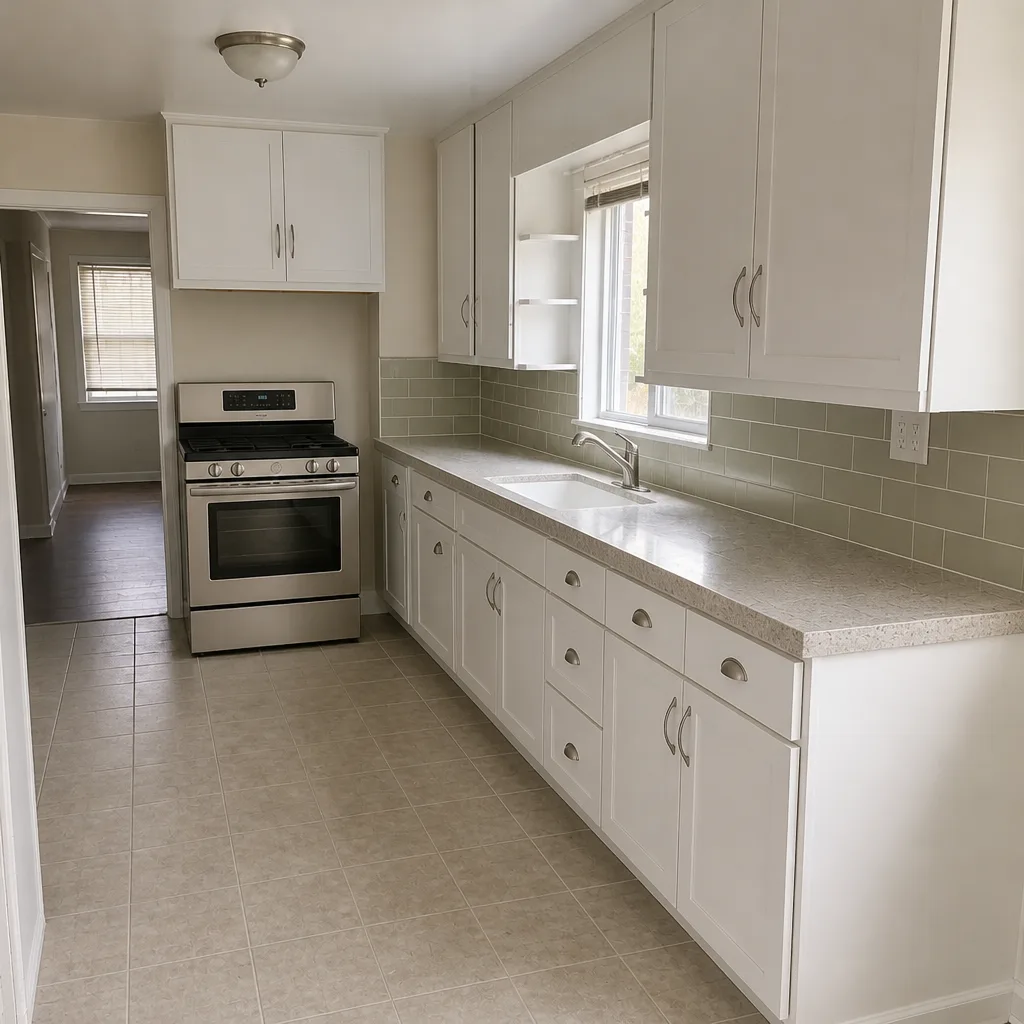 After
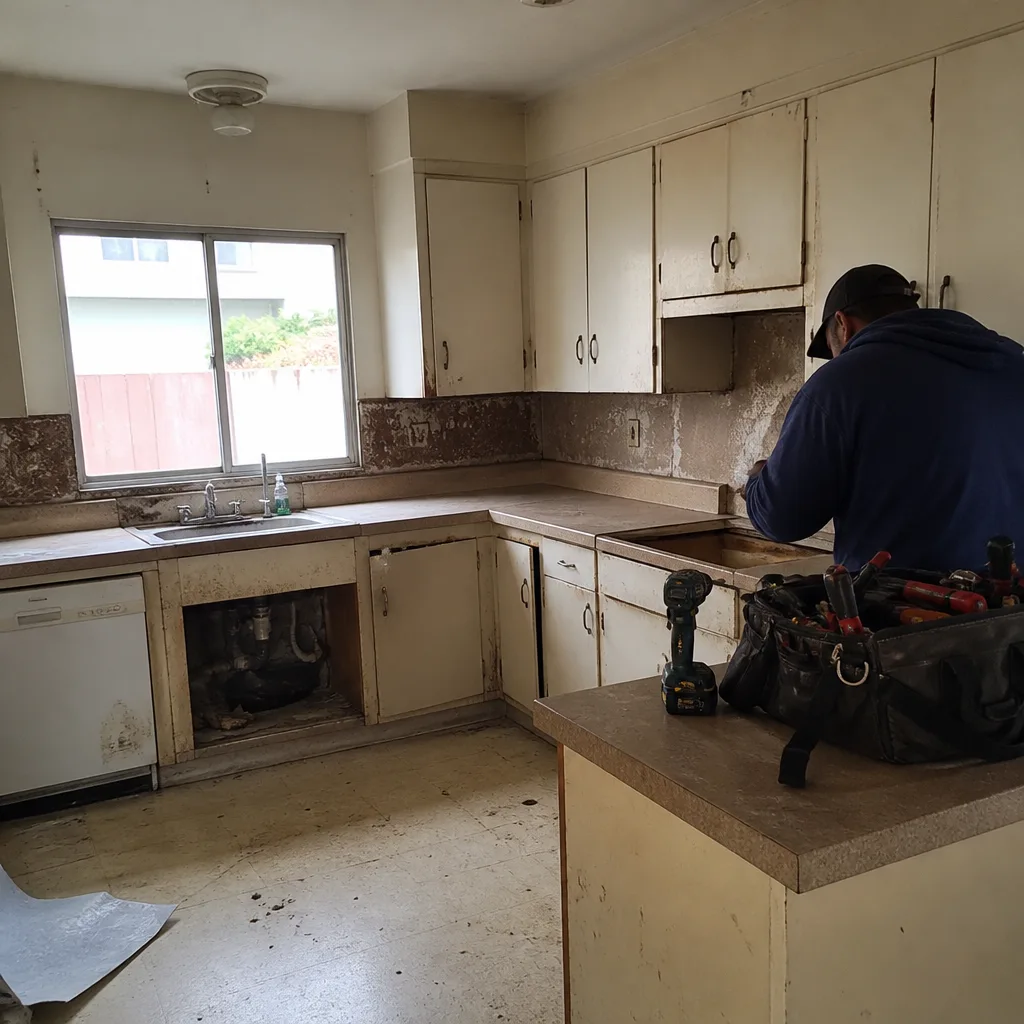 Before
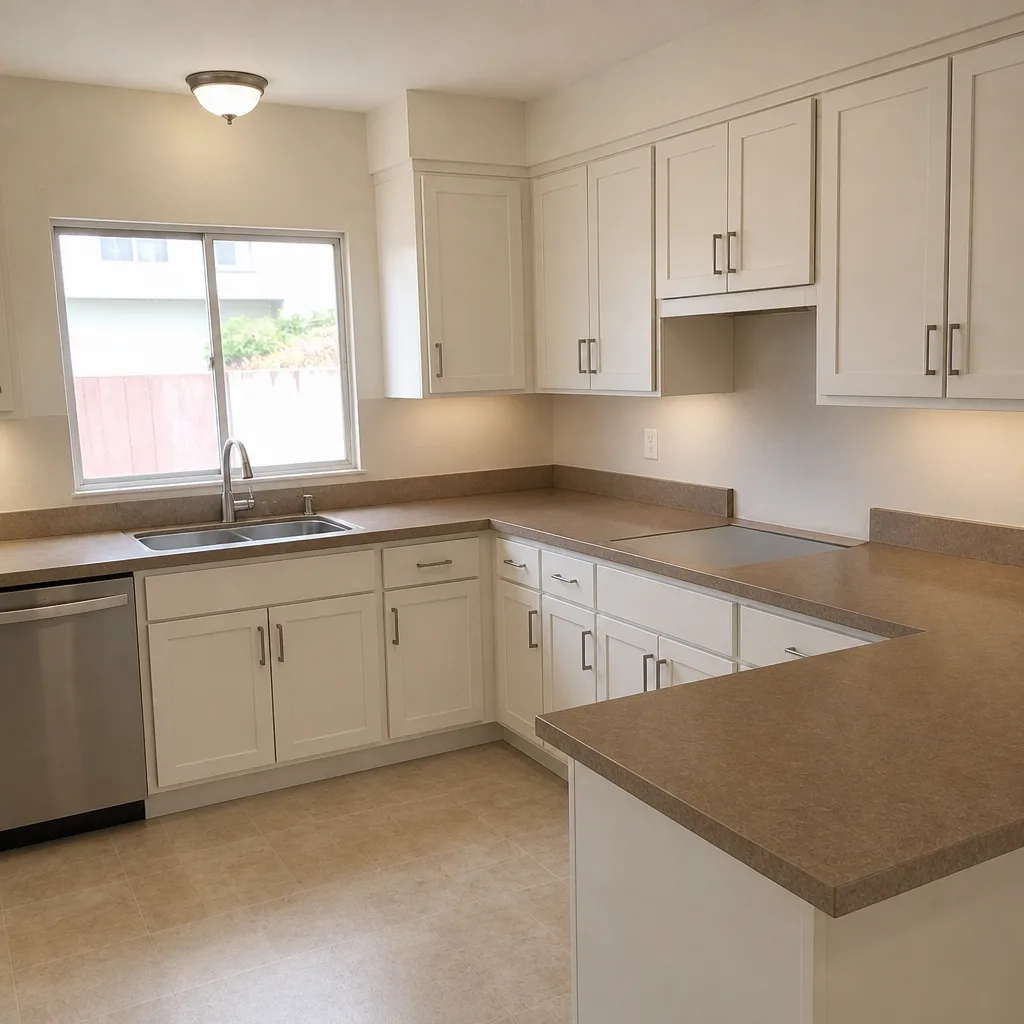 After
When to Call a Professional
Some tasks you can handle yourself with a caulk gun, a screwdriver and an afternoon. Others need a trained eye before you touch anything. Call a professional when you see flex in a floor tile, a straight-line grout crack, soft drywall near a wet area, or any musty smell you can’t trace. Call before the 1-year warranty mark if you spot anything that might be workmanship. And call if a repair keeps coming back – a hinge that loosens every six weeks or a caulk seam that opens every few months is telling you the substrate or the joint design has a problem, and repeating the same fix won’t solve it. Penhallow Remodeling Long Beach offers free estimates in Long Beach – call (833) 510-6967. Our technicians have up to 22 years of experience, arrive background-checked and in uniform, and we’ll put the price and the guarantee in writing before any work starts.
Frequently Asked Questions
Reseal caulk joints in wet areas every 6 to 12 months, and seal grout every 12 to 18 months. In Long Beach, coastal humidity pushes caulk toward the shorter end of that range. Feel the joint with a fingernail – if it’s gummy or cracking, reseal it now. Call (833) 510-6967 if you’re unsure whether a joint is maintenance or a workmanship issue; estimates are free.
It can, yes. Most workmanship warranties assume basic upkeep – sealed joints, functioning ventilation and prompt reporting of failures. A contractor can decline a claim if the failure came from neglect rather than work. Our 365-Day Done Right Promise covers work that fails inside the guarantee period, and we put that promise in writing; the best way to protect both sides is a 10- or 11-month inspection before the window closes.
The highest-priority tasks are resealing the backsplash-to-counter joint, checking for moisture under the sink, and adjusting hinges and drawer glides around the 6-month mark. Avoid over-tightening hardware. A slow drip from a supply line can swell a cabinet base within one humid season in Long Beach, so look under the sink every few months. Call (833) 510-6967 for a free estimate if anything looks off.
Tap the tile lightly with a plastic tool – a hollow sound over a patch means the thinset didn’t bond. Add flex underfoot, a straight-line grout crack, or soft drywall at the edge of a tub, and you have a substrate question. Stop touching it and get a professional in, because substrate repairs grow fast. Estimates are free – call (833) 510-6967.
No, not the way you would in a freeze-thaw climate. Long Beach doesn’t get hard freezes, so pipe winterizing and ice-dam prep don’t apply. Your real threats are coastal humidity, salt air and seasonal fog, which is why moisture and ventilation tasks get more of your calendar than seasonal shutoff rituals do.
Typical ranges: $80 to $150 to reseal caulk in a bathroom, $100 to $200 to seal grout in a shower or floor, $50 to $100 to adjust kitchen cabinet hardware, and $300 to $600 for a comprehensive annual walkthrough across the whole home. A substrate repair, by contrast, runs $2,500 to $8,000 depending on scope. Call (833) 510-6967 for a written quote – estimates are free and the number is fixed before work starts.
The Bottom Line

Your remodel holds up on the same principle a written price does: the terms are clear up front, and you meet them on both sides. That means a simple schedule – reseal caulk and grout in wet areas, adjust cabinet hardware twice a year, watch for flex and hollow sounds, and do a deliberate inspection before the 1-year warranty mark. Long Beach’s coastal humidity makes moisture the priority and lets you skip the winterizing steps colder climates require. The reward is a kitchen or bath that looks new past its fifth year and a warranty that stays intact when you need it. Whether you’re planning a remodel or protecting one you’ve already had done, our team at General Contractor in Long Beach is glad to walk through your maintenance questions. When you’re ready to plan the next project, call Penhallow Remodeling Long Beach at (833) 510-6967 for a free estimate – we’ll put the price and the guarantee in writing before a single cabinet is pulled or tile is set.
Written by the team at Penhallow Remodeling Long Beach.