

Last updated November 17, 2026








Free written scope consultation - allowances, timeline, and change-order rules on paper before a single trade is scheduled
Kitchen Remodeling Maintenance Schedule: What to Do and When
The grout sealer your contractor applied on day one has about a 12-month lifespan. Almost nobody hands that fact over at the punch list. By year two the grout lines around your range are absorbing cooking oil, and no amount of scrubbing brings them back. That’s a preventable problem, and eventually it becomes a regrout bill. A new kitchen in Long Beach is a real investment, and like any investment it has a maintenance calendar. This guide walks you through the full first year month by month, then the annual and every-three-year tasks, with the local details that matter near the coast.
Quick Answer
Clean and inspect your kitchen monthly, re-seal grout and caulk every 12 months, replace your range hood filter every 3 to 6 months, and re-seal natural stone countertops once a year while quartz needs no sealing at all. Document each task in a simple log, because that log protects both your warranty and your resale value. Most of the schedule is ten minutes of work here and there, not a weekend project.
Styles & brands we work with
- Kitchen remodeling
- Bathroom remodeling
- Home additions & ADU
- Roofing
- Windows & doors
- Driveway & pavers
- Fence
Table of Contents
- Your First-Year Calendar: Month by Month
- Grout and Caulk: The 12-Month Clock
- Annual Tasks vs. Every-Three-Year Tasks
- Re-Sealing Countertops by Material
- Salt Air and Coastal Hardware: Long Beach Notes
- Normal Settling vs. a Warranty Claim
- Keeping a Maintenance Log
- Common Mistakes to Avoid
Your First-Year Calendar: Month by Month
The first year after a kitchen remodeling in Long Beach is when everything is still settling and everything is still under warranty. Treat these twelve months as the most important in the life of the room. Here’s what to do and when.
- Month 1: Do a full visual sweep. Open every cabinet, check that hinges are snug, confirm the undermount sink clips are tight, and look at caulk lines at the backsplash and sink for gaps. New caulk occasionally pulls as materials shift in the first weeks.
- Month 2: Test the garbage disposal with cold water running. Reset it if it trips, and note any grinding or humming that doesn’t clear. Check the dishwasher’s drain connection for slow spots.
- Month 3: Inspect the range hood filter. If it’s the mesh type, clean it; if it’s charcoal, note the replacement interval on your log. Check cabinet doors for alignment drift.
- Month 4: Look under the sink and around the dishwasher for any moisture. A small drip caught in month four is a warranty fix; caught in year three it’s a cabinet replacement.
- Month 6: Re-check every hinge and drawer slide. Tighten what’s loosened. Confirm grout lines haven’t cracked at high-traffic corners.
- Month 9: Refresh caulk if you see any cracking or peeling. Test the disposal again. Check that countertop seams remain flush.
- Month 12: The big one. Re-seal grout, re-seal any natural stone, and do a full inspection before your first-year warranty window closes.
If you’re planning a larger remodel that also touches the bath, our guide to bathroom remodeling in Long Beach covers the parallel schedule for wet rooms. And if the kitchen work is part of a bigger project, our general contractor in Long Beach page explains how we sequence these phases.
Grout and Caulk: The 12-Month Clock
Two materials fail fastest in a kitchen, and neither failure is dramatic. Grout and caulk just quietly stop doing their job. Grout sealer wears off at about the 12-month mark under normal use, faster around the range and sink where grease and water land daily. Caulk at the backsplash seam and sink perimeter dries and pulls, and that’s where water starts sneaking behind the tile.
What to check
- Run a finger along the caulk at the backsplash and sink. Any crack, gap, or peeling means it’s time to replace.
- Drip a few drops of water on the grout in a low-traffic area. If it beads, the sealer is still holding. If it soaks in dark, it’s gone.
- Look at grout color in corners and near the range. Darkening that doesn’t scrub out means oil has penetrated.
What to do
- Clean grout with a pH-neutral cleaner, never vinegar or bleach on natural stone.
- Let it dry a full 24 hours before sealing.
- Apply penetrating sealer per the product label, let it sit the recommended time, and wipe the excess.
- Replace any caulk that fails the finger test, using a kitchen-rated silicone, not painter’s caulk.
In our experience, Long Beach kitchens near the water see faster caulk failure than inland ones, because the humidity cycles more. If you’re within a mile of the coast, plan on checking caulk at the six-month mark too, not just at twelve.
Annual Tasks vs. Every-Three-Year Tasks
Not everything runs on the same clock. Here’s how to split your calendar.
Every year
- Re-seal grout.
- Re-seal natural stone countertops.
- Inspect and refresh caulk.
- Deep-clean the range hood filter and replace charcoal filters.
- Test the garbage disposal and note any change in sound or performance.
- Check every cabinet hinge and drawer slide, tighten as needed.
- Inspect the undermount sink clips.
Every three years
- Pull the refrigerator out and vacuum the coils. Dust buildup up costs you energy and shortens the appliance’s life.
- Inspect the under-sink plumbing connections for slow corrosion.
- Have the range hood ductwork checked for grease buildup.
- Re-caulk the entire backsplash and sink perimeter proactively, even if it still looks fine.
- Check cabinet door alignment across the whole kitchen and adjust hinges if doors are drifting.
Range hood filters are the most neglected item on this list. Mesh filters should be degreased every three months; charcoal filters need replacement every three to six months depending on how much you cook. A clogged filter doesn’t just hurt air quality, it makes the hood work harder and shortens its motor life.
Re-Sealing Countertops by Material
Countertop care depends entirely on what the surface is made of. Here’s the honest breakdown.
- Quartz (Cambria, Silestone, Caesarstone): No sealing required. These are non-porous engineered surfaces. Wipe with mild soap and water, avoid harsh chemicals, and use a trivet for hot pans. The manufacturer’s own warranty usually runs alongside ours, so register the product when you get the paperwork.
- Granite and natural stone: Re-seal once a year. The water-bead test tells you if it’s due early. Use a penetrating sealer made for stone.
- Marble: Re-seal every six to twelve months. Marble is more porous and etches easily, so keep acidic foods and citrus off it and wipe spills promptly.
- Butcher block: Oil every one to three months with food-grade mineral oil. Never let it sit wet.
If you chose a Cambria or Silestone slab during your remodel, you already have one of the most maintenance-light surfaces on the market. If you’re weighing materials for a future project, our Penhallow Remodeling Long Beach home page links to more on how we help homeowners choose.
Salt Air and Coastal Hardware: Long Beach Notes
Long Beach has a marine climate that most maintenance guides ignore. If your kitchen sits within a mile or so of the coast (think Belmont Shore, Naples, or the peninsula), salt air is working on your exposed metal every day. Cabinet hardware, faucet finishes, and any exposed hinges will show it faster than the same items would in a home ten miles inland.
- Faucet finishes: Rinse and dry the faucet and any metal fixtures weekly. Salt residue left to sit dulls finishes and can pit them over time. A Kohler or Moen finish holds up well, but no finish is immune to standing saltwater.
- Cabinet hardware: Wipe pulls and knobs monthly with a damp cloth and dry them. Salt and humidity accelerate tarnish on lower-grade metals.
- Ventilation: Run the range hood every time you cook, and run it a few minutes after you finish. Coastal humidity plus cooking steam is harder on cabinets than either alone.
- Exterior door hardware and window frames: Wipe down any metal that’s exposed to the outside, including the patio door tracks.
We’ve seen kitchen hardware in coastal Long Beach homes degrade in two years that would have lasted five inland. The fix is simple: dry, dry, dry.
Normal Settling vs. a Warranty Claim
Homes move. New cabinets settle, grout hairline-cracks, doors drift out of alignment. Most of what you’ll see in the first year is normal. The trick is knowing where normal ends and a warranty issue begins.
Normal settling
- Hairline cracks in grout at inside corners. These are cosmetic and expected as materials cure.
- Cabinet doors slightly out of alignment. Adjustable hinges handle this with a screwdriver.
- A faint creak or pop from cabinets as they expand and contract with the seasons.
Warranty-eligible defects
- Grout cracking in straight runs, not just corners, especially at the tile edge.
- Caulk pulling away from the wall or tile in a way that lets water behind it.
- A cabinet door that won’t stay closed after adjustment, or a hinge that’s coming loose from the cabinet frame.
- Undermount sink clips that have loosened and let the sink drop or shift.
- Any water intrusion behind a backsplash or under a sink with no obvious cause.
- A drawer slide that fails under normal use.
Penhallow Remodeling backs every project with our 365-Day Done Right Promise: if the work fails inside the guarantee period, we come back and fix it at no charge. If a repair fails, we do a free second visit, no service call and no re-inspection fee. Because that window is 365 days, month twelve is the moment to do your full inspection and call anything questionable in writing.
Keeping a Maintenance Log
A maintenance log is a single sheet of paper or a simple spreadsheet. It costs nothing and pays off in two ways.
- Date every task. Note the date, what you did, and what product you used. For example: “3/14 – resealed grout with penetrating sealer.” When you sell, this reads as proof the kitchen was cared for.
- Note any issue you call in. If you call about a hinge, log the date and what was said. This ties directly to your warranty documentation.
- Keep the product records. Note the brand and model of your cabinets, countertops, fixtures, and appliances. Cambria, KraftMaid, and Wellborn all carry their own product warranties, and those warranties require you to know what you bought.
- Review it once a year. Set a reminder for the same month each year, right around the time of your remodel anniversary, and do your full walk-through.
When a Long Beach home goes on the market, a kitchen with a documented maintenance history is easier to sell and easier to price. Buyers respect a log in a way they don’t respect a spotless countertop, because the countertop can be faked and the log can’t.
Common Mistakes to Avoid
- Using vinegar or bleach on natural stone. The acid and the bleach both attack the sealer and the stone itself. Use a pH-neutral cleaner, even on a tough stain.
- Skipping the month twelve inspection. Your warranty window closes at day 365. Anything you haven’t documented by then is harder to claim.
- Letting a small caulk crack go. A crack at the sink edge looks like nothing, but it’s how water gets behind the backsplash. Fix it while it’s small.
- Wet-mopping near the dishwasher or sink cabinet base. Standing water finds cabinet seams. Long Beach’s humidity slows drying, so a damp floor sits longer than you’d think.
- Ignoring the range hood filter. Grease-clogged filters are a fire risk and a motor killer. Degrease the mesh filter quarterly, replace charcoal filters on schedule.
- Assuming quartz needs sealing. It doesn’t. If a service tells you your Cambria or Silestone needs sealing, ask why.
- Throwing out the product paperwork. The manufacturer’s warranty on your cabinets, countertops, and fixtures often runs longer than any labor warranty. Keep the documents in the maintenance folder.
See the difference
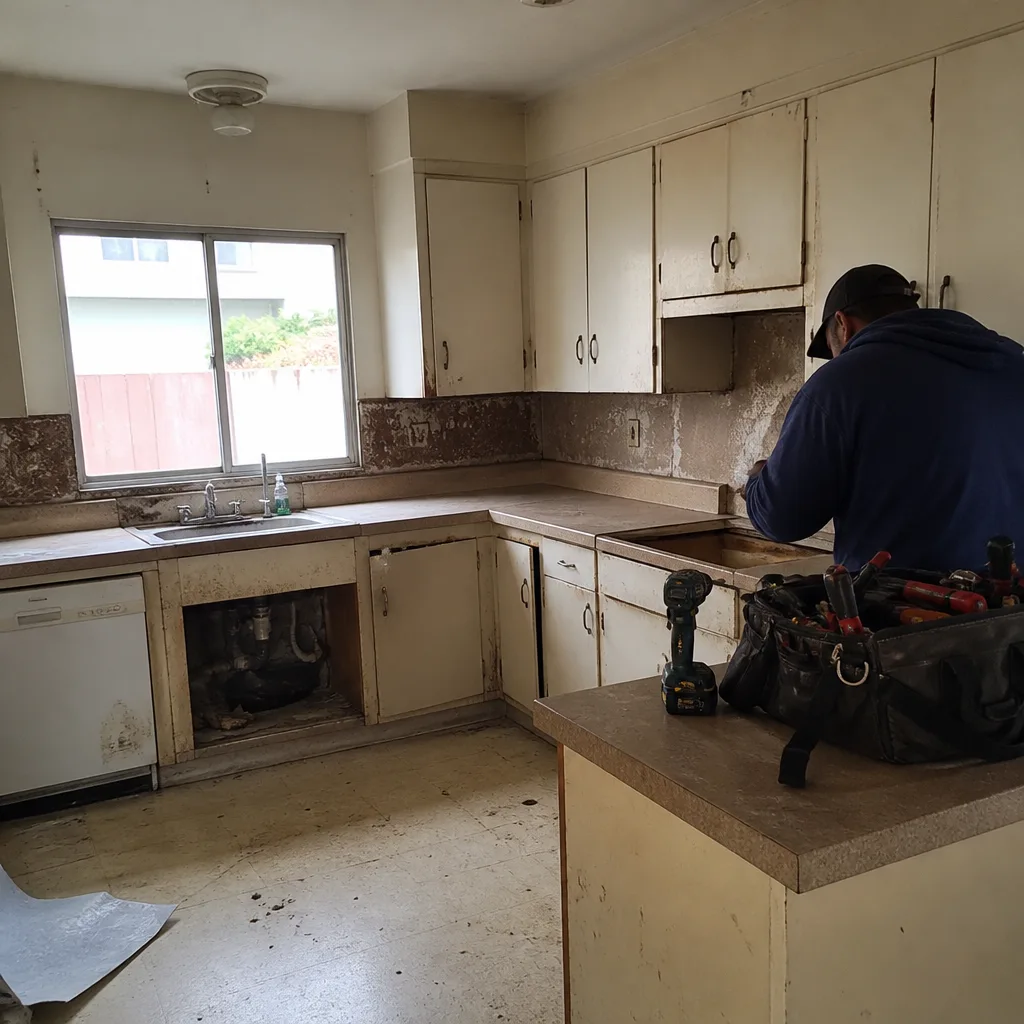
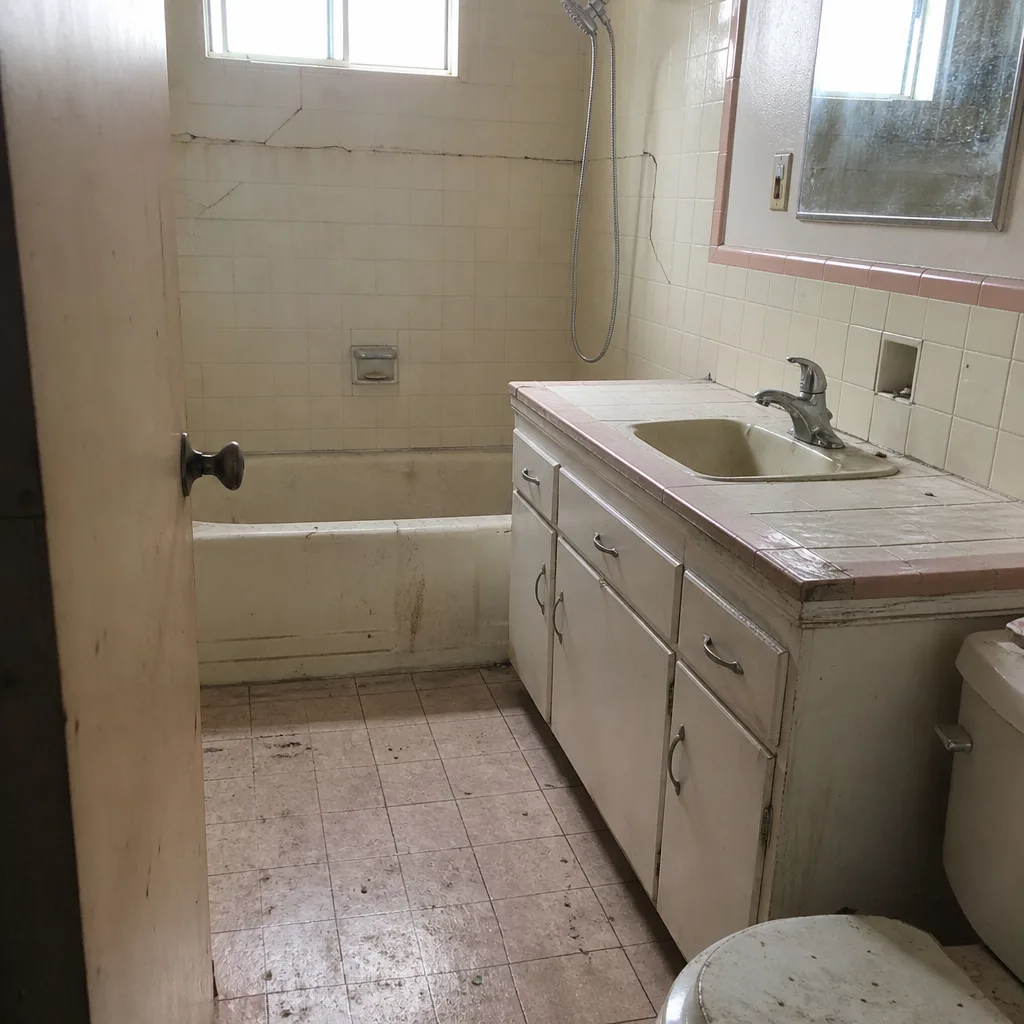 Before
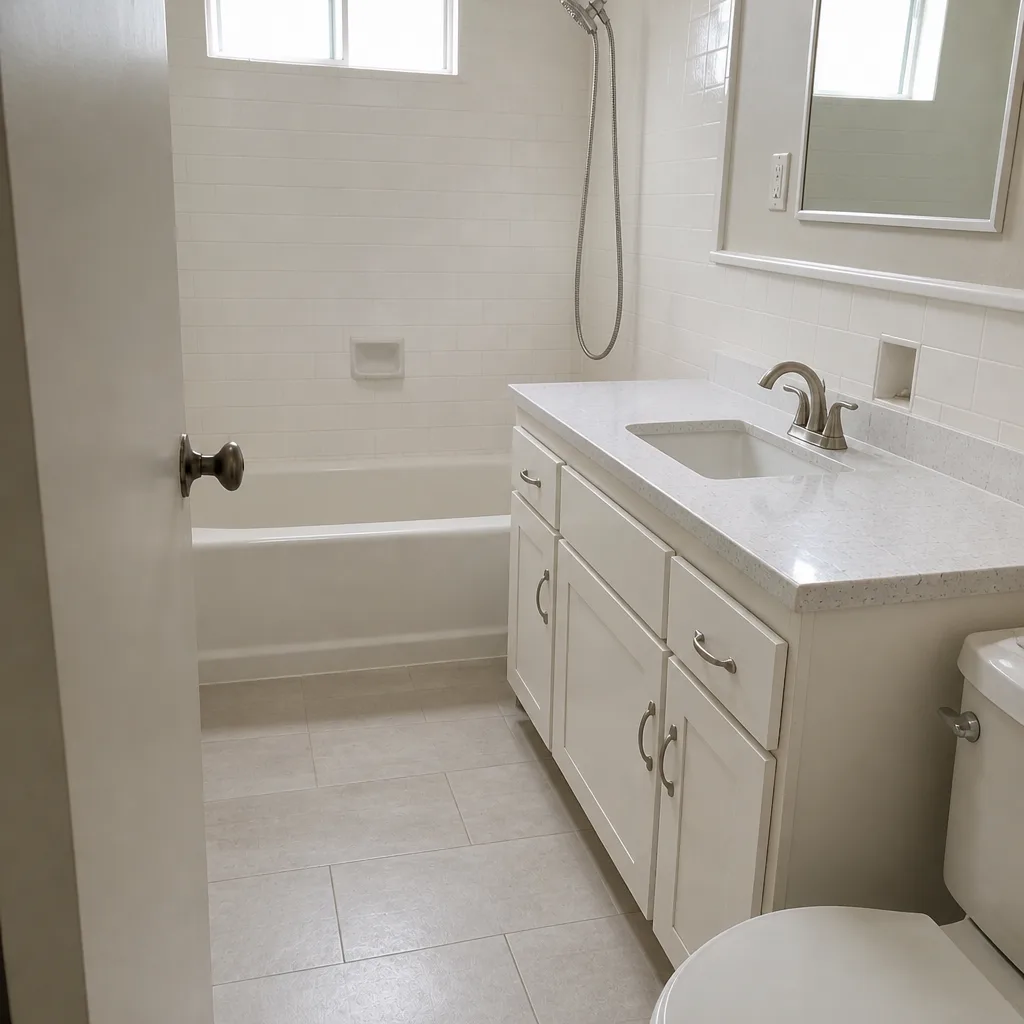 After
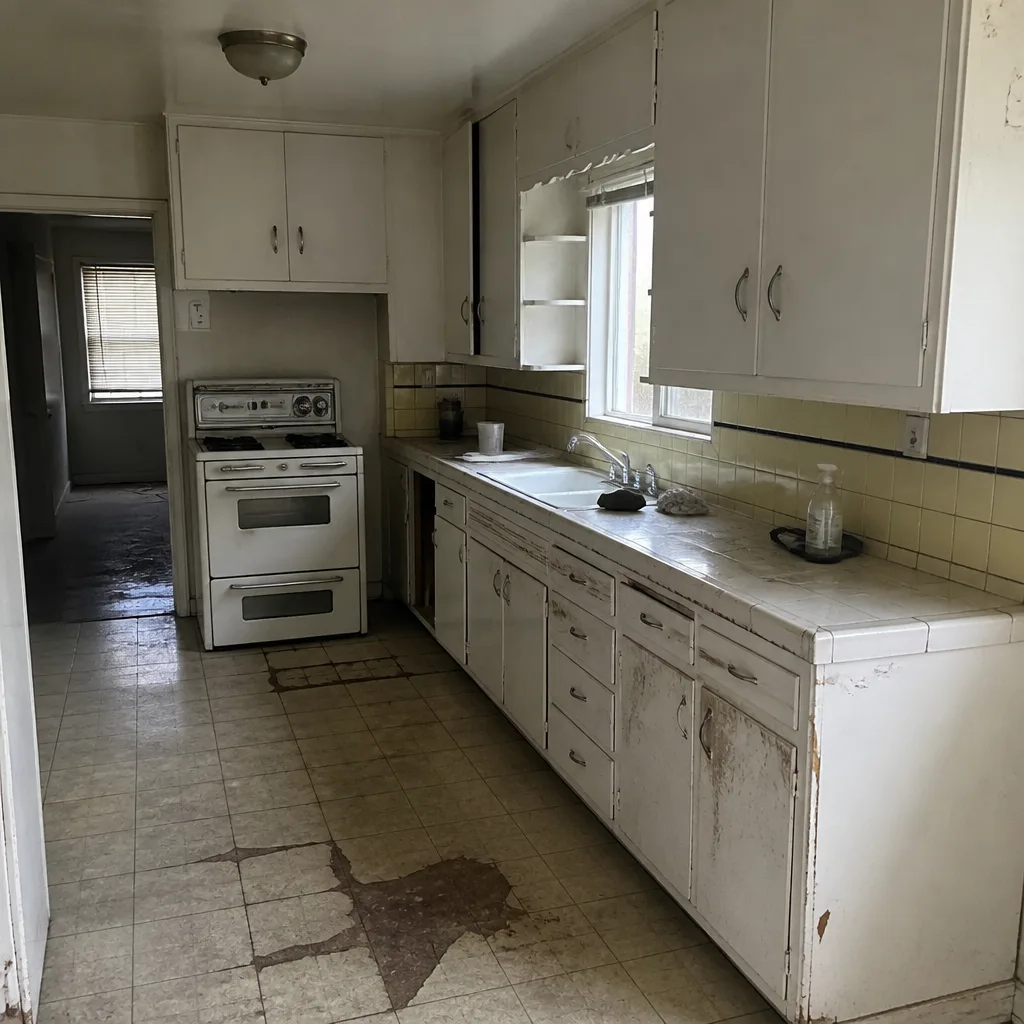 Before
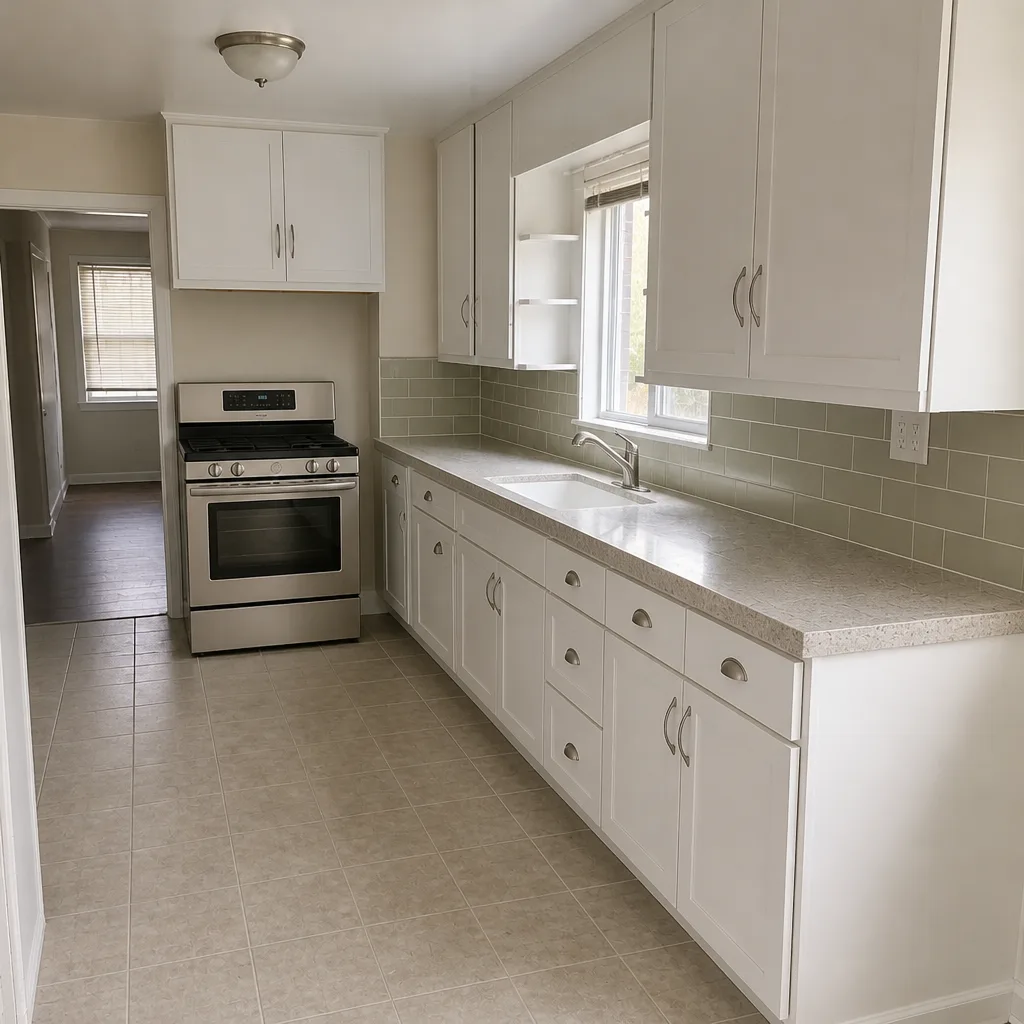 After
 Before
 After
When to Call a Professional
Most of this schedule you can handle yourself with a cloth, a screwdriver, and a bottle of sealer. Call a professional when water has gotten somewhere you can’t see, when a cabinet door or drawer has failed in a way adjustments can’t fix, when grout has cracked in a straight run across the floor or wall, when you notice moisture or discoloration inside a cabinet, or when you’re approaching month twelve and want a full inspection before the warranty closes. Anything electrical near a sink or gas near a range should go to a trained professional, not a weekend project. Penhallow Remodeling Long Beach offers free estimates in Long Beach, and our technicians have up to 22 years of experience. Call (833) 510-6967.
Frequently Asked Questions

Once a year under normal use, and more often if you’re within a mile of the coast. Sealer wears faster where humidity and cooking oil combine, so check the water-bead test at the six-month mark and again at twelve. Call (833) 510-6967 for an exact schedule based on your kitchen.
No. Quartz surfaces from Cambria, Silestone, and Caesarstone are non-porous and require no sealing at all. Clean with mild soap and water and register the manufacturer’s warranty when you get your paperwork.
Hairline grout cracks at inside corners and doors slightly out of alignment are normal settling and easy to adjust. A crack in a straight run, caulk pulling away, a hinge coming loose from the cabinet frame, or an undermount sink that’s shifting are warranty issues and should be documented. Call (833) 510-6967 to report anything you’re uncertain about.
Dry it weekly. Wipe pulls and knobs with a damp cloth, dry them completely, and repeat monthly. Salt air on Long Beach’s coastal neighborhoods accelerates tarnish, and drying is the single most effective task on the list.
The mesh filter needs degreasing every three months, and charcoal filters need replacement every three to six months depending on cooking volume. A grease-clogged filter is a fire risk and forces the motor to work harder. Call for a quote if your hood needs replacement during the remodel.
Yes, materially. A documented history of resealing, caulk replacement, and warranty claims tells a buyer the kitchen was cared for. It’s one of the cheapest things you can do for your resale price. Call (833) 510-6967 for a free estimate on any kitchen work.
The Bottom Line
A remodeled kitchen runs on a simple calendar. Clean monthly. Inspect hinge, drawer slide, sink clip, and hood filter every few months. Re-seal grout and natural stone once a year. Re-caulk proactively every three years. Check everything one last time in month twelve, before your 365-Day Done Right Promise closes, and log everything you do. Coastal Long Beach homeowners should add a monthly drying routine to keep hardware and fixtures from tarnishing. The written price we give you before work starts and the written guarantee we hand over at the end both mean more when you’ve protected the investment with a maintenance log. That’s The Kingswell Way: say the price before the work, show up in the window, leave it cleaner than we found it, and stand behind the job. Call (833) 510-6967 for a free estimate.
Written by the team at Penhallow Remodeling Long Beach.